How to Clean Nail Art Brushes Without Damaging Them
If you're serious about your nail art, you know how essential your tools are. Nail art brushes are the backbone of creating intricate designs, crisp lines, and flawless details. But improper cleaning can quickly ruin them, leading to frayed bristles and inconsistent application. Don’t worry—with the right techniques, you can keep your brushes in perfect condition for years to come. Here’s how to clean your nail art brushes without causing damage.
Why Proper Cleaning Matters
Regular cleaning not only extends the lifespan of your brushes but also ensures precision in your nail art. Residue left on the bristles can harden and distort their shape, making it impossible to achieve detailed designs. Proper cleaning also prevents color contamination and keeps your tools hygienic for safe use.
What You'll Need
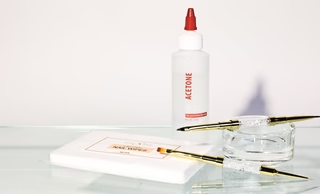
Before we start, gather these items to clean your brushes effectively:
- Acetone or Isopropyl Alcohol (for cleaning brushes used with gel or acrylics)
- Brush Cleaner (optional but ideal for maintaining bristle softness)
- Lint-Free Wipes or Paper Towels
- Mild Soap (for water-based or natural paints)
- Small Dish or Container
Now, let's break it down into easy, detailed steps.
Step 1: Remove Excess Product
Use a lint-free wipe or paper towel to wipe off as much excess polish, gel, or paint as possible. Hold the brush gently and avoid pulling at the bristles.
Step 2: Choose the Right Cleaning Solution
The type of product on your brush determines the solution you’ll need:
- For Gel or Acrylic-Based Products
Use acetone or isopropyl alcohol. These dissolve hardened and sticky residues effectively. However, prolonged use of acetone can dry out natural bristles, so use sparingly.
- For Water-Based or Natural Paints
A few drops of mild soap in warm water will do the trick. Avoid hot water as it can weaken the glue that holds the bristles in place.
Step 3: Dip and Swirl
Pour a small amount of your cleaning solution into a shallow dish or container, just enough to submerge the tips of the bristles. Gently swirl the brush in the solution, ensuring the liquid reaches all bristles. Do not press the brush into the bottom of the container, as this could bend the bristles or ruin their shape.
Step 4: Blot and Wipe
After swirling, blot the brush on a lint-free wipe or paper towel. Gently wipe from the base of the bristles to the tip in one direction to remove any remaining product. Never twist or tug on the bristles.
Step 5: Rinse (If Necessary)
For brushes cleaned with acetone or alcohol, rinsing isn’t strictly necessary, but it can help remove any chemical residue. For water-based products, rinse the brush under lukewarm water until the soap and paint are fully gone.
Step 6: Reshape the Bristles
After cleaning, reshape the bristles using your fingers. Maintaining the proper shape ensures the brush stays functional and can continue delivering fine lines or smooth strokes.
Step 7: Dry Them Properly
Place your brushes on a clean, flat surface with the bristles hanging slightly off the edge of a table or counter. This allows them to air dry while maintaining their shape. Avoid standing brushes upright to dry, as water can seep into the ferrule (the metal part holding the bristles) and weaken the glue.
Tips to Keep Your Nail Art Brushes in Top Shape
- Clean Immediately After Use: Don’t wait for the product to dry on your brushes. Cleaning them right after use prevents buildup and makes the process easier.
- Avoid Harsh Chemicals: While acetone is effective, overuse can damage bristles. For frequent cleaning, opt for a brush cleaner that’s gentler.
- Store Brushes Properly: Always store your brushes with their bristles protected. Use a brush case or wrap them in tissue paper to avoid dust and debris.
- Don’t Use the Same Brush for Different Products: Dedicate specific brushes for gel, acrylic, or paints to avoid ruining them with incompatible products.
Wrapping Up
Your nail art brushes are an investment, so treating them with care is essential. By following these steps, you can keep your brushes clean, functional, and ready to help you create stunning designs. Cleaning might feel like an extra chore, but the payoff is worth it—not just in the longevity of your tools but also in the quality of your nail art.
Happy painting!